
Reversible Tulip Tops
So, I have to admit that I struggle with a lot of the toddler and little girls clothing out there. I find that so much of it is plastered with words and imagery that convey implicit messaging about gender which I choose to avoid whenever I can. I frankly feel uncomfortable dressing my daughter in shirts which associate girlhood with being a princess/heart breaker/shopper-in -training. Even the colour schemes of kids clothing seem to be more aggressively gendered than adult clothing. I like a pink sparkle as much as the next gal, but I also love navy, and black, and grey, and so do my girls.
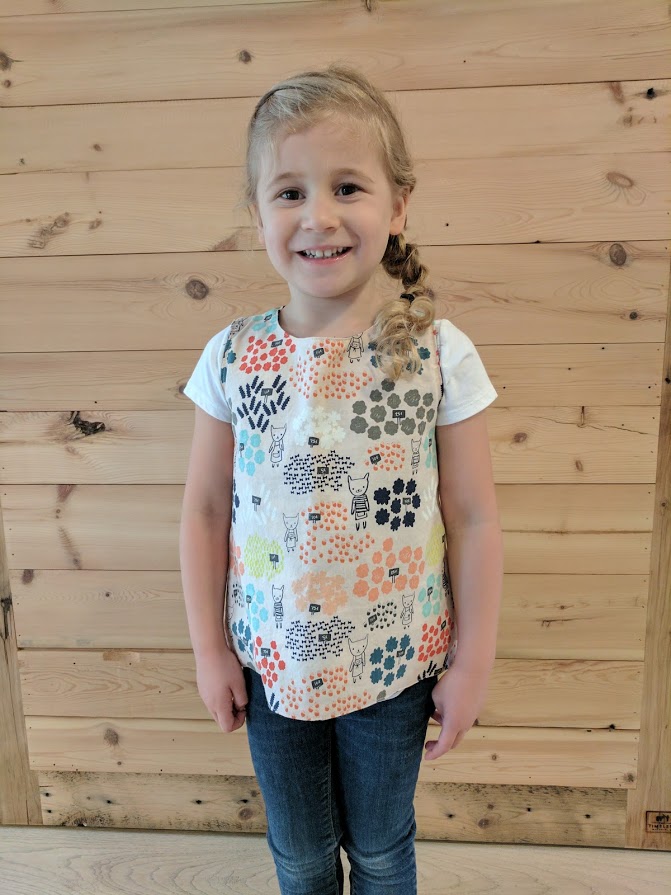
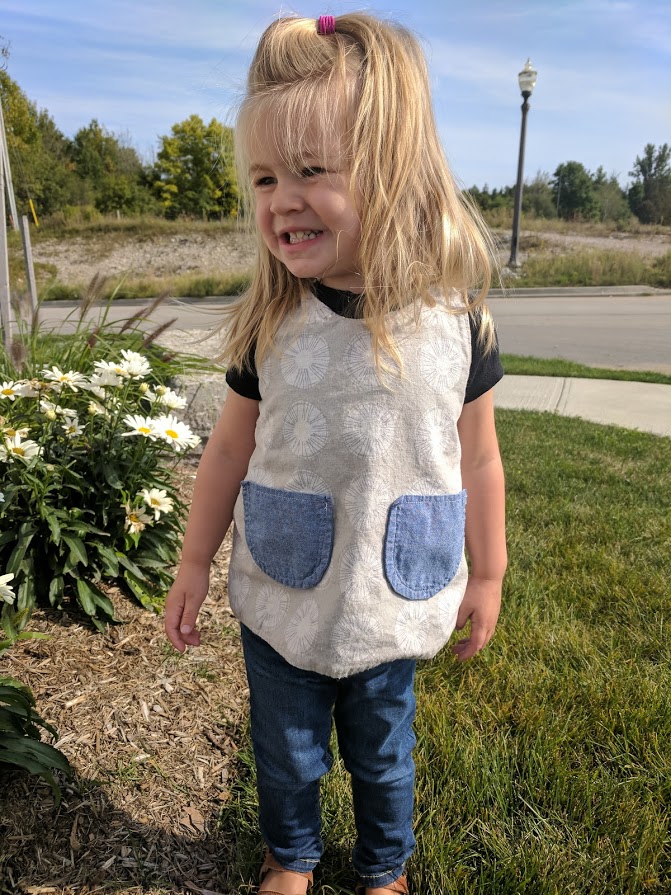
Finding clothes which feel simple and neutral, and which are also made to last from quality materials, can be a challenge. At the same time, I want my kids clothes to feel fun and whimsical and child-like. Striking just the right balance can be tricky. Enter the tulip top. I just can't stop making these cleaver, hardworking little shirts. They are so easy to whip up, and they look so great with a basic t-shirt and jeans.
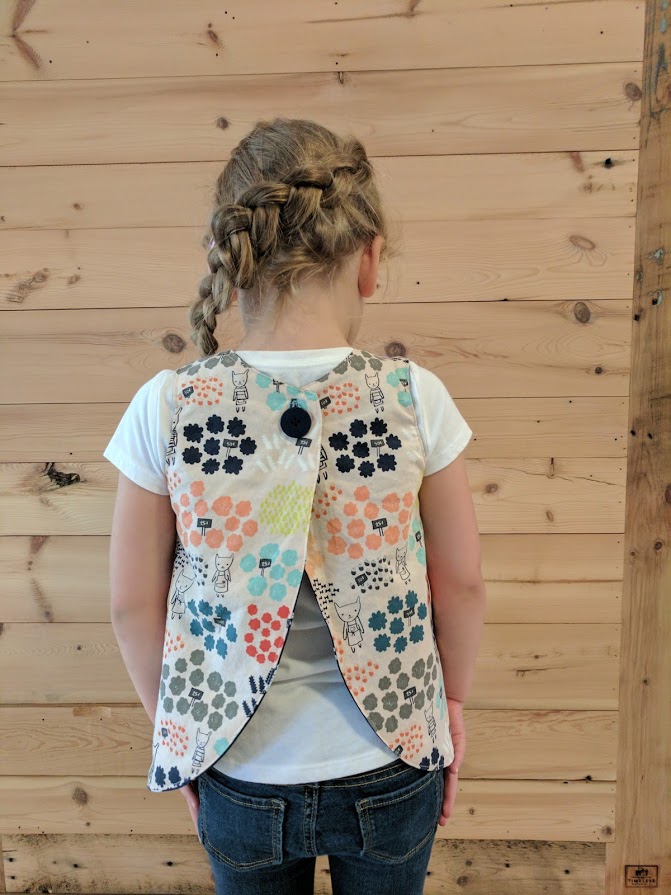
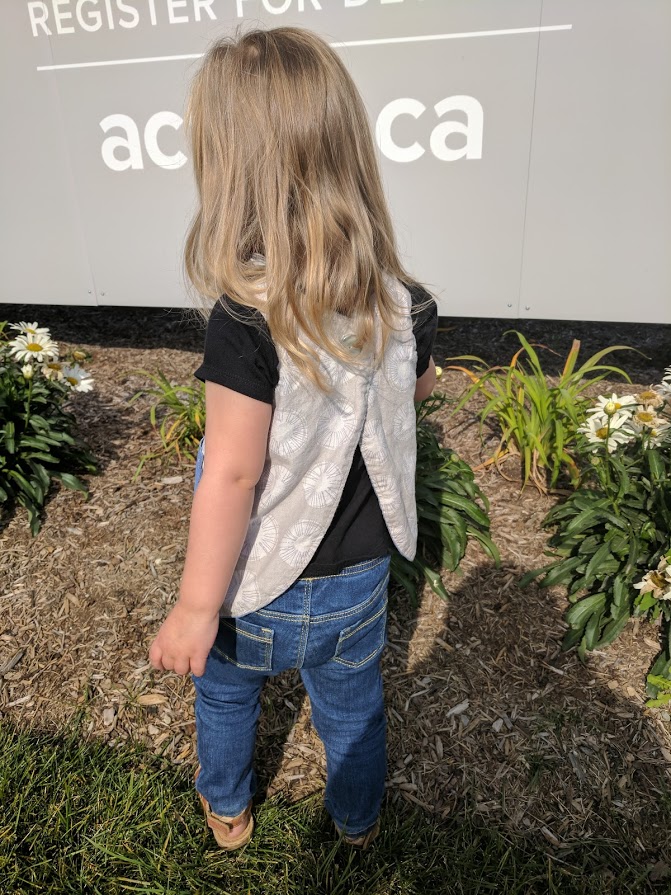
My jumping off point for these tops was a simple pattern from the Etsy shop OOna Pattern Co. (See link below). It about $10, and I have used it so many times. I decided to up the versatility factor by making my version reversible. All I did to achieve this was to sew a second button of identical size to the back of the shirt directly opposite the first button. I did this all in one go, passing the thread through one button, then the fabric of the shirt, then the holes of the next button. It took a bit of trial and error to get the tension just right--too tight and the button won't do up. Too loose and it will fall off.
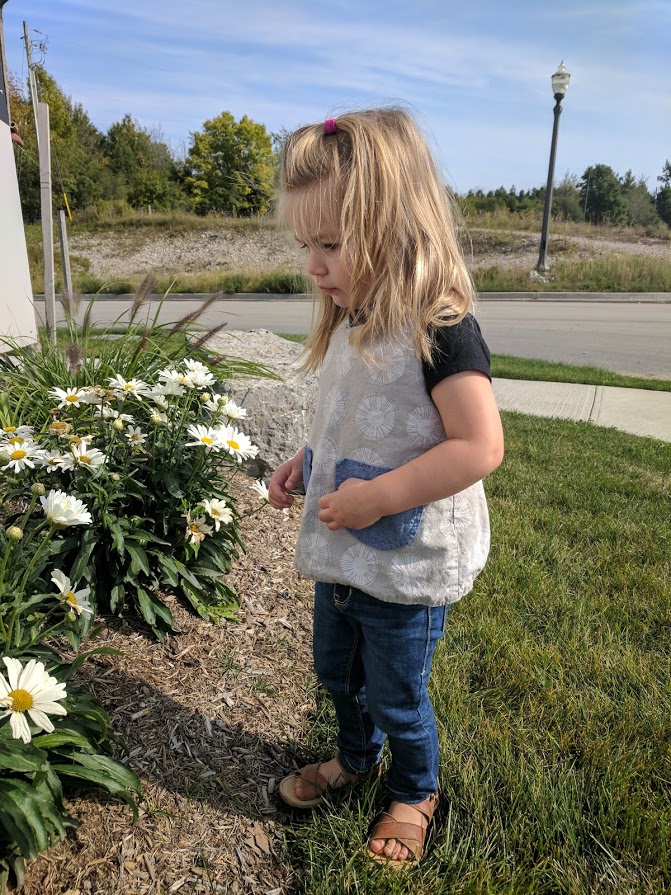
I also added some simple patch pockets to some of the tops. I did this by creating a template in the shape of my pocket, and pinning it to my pocket fabric, which I had folded in half, right sides together, with the top edge positioned along the fold. I cut around the template, making sure not to cut the top edge. I stitched around the sides of the pocket, leaving a gap of about two inches on one side. I then turned the pocket inside out through the gap, revealing the right side of the fabric. I gave it a good press, making sure to tuck in the edges where the gap in the stitching was. I then pinned the pocket into position on the bodice piece and stitched around the sides of the pocket as close to the edge as possible, taking care to back stitch at the corners. I then repeated with the second pocket.
These are seriously one of the most satisfying projects I have ever completed. They feel modern and also kind of old fashioned at the same time, and I love that they can be worn year round. The best part, though, that if your kid spills on their shirt you can just turn it around. Then, if they spill again, you can just remove it all together and still have a clean shirt underneath. Genius!
Original pattern source:
https://www.etsy.com/ca/listing/199785203/tulip-pinafore-pdf-sewing-pattern-sizes


